
This post may contain affiliate links which means I may receive a commission for purchases made through links.
Adding molding to your home provides a finished look and increases your property value. In most cases, the molding is fastened to the cabinet or wall with finish nails to ensure a tight & professional installation. However, there are instances when nailing molding, thus forcing you to look for alternative ways to install crown molding without a nail gun.
One such technique is using construction-grade adhesive using the steps I’ve listed below!
Step-by-Step guide on how to install crown molding without nailing
Step 1
Measure the wall to determine the total length of molding you need for your project. Next, choose the type of molding you intended to install, then prime and paint it, if necessary before you cut it. Lightwood wood is considered the best crown molding for construction adhesive.
Step 2
Clean and dry the wall surfaces before you install the molding. Also, ensure there is no loose drywall or paint.
Step 3
Cut the end of the 1st piece of molding with one of the best miter saws for crown molding. Make sure you set the saw table at an angle of 45 degrees. In this case, set both the saw table and saw blade at a 45-degree angle to cut the end of your molding at that angle.
Remember, the angle direction will depend on the corner you’re starting from. More importantly, you should trim inside corners and outside corners in opposite directions. If necessary, use sandpaper to lightly sand the rough edges.
Step 4
Dry-fit the cut piece of crown molding to see how it will fit. Put it against the wall and butt another cut piece up to it to check if the fit and angles work.
Step 5
Insert the construction adhesive cartridge into a caulking gun and cut off ¼” of its plastic tip at a 45-degree angle with a blade. Puncture the inner seal of the canister and apply construction adhesive to the back of your crown molding in a zigzag pattern, keeping it at least ½” from the edge.
Step 6
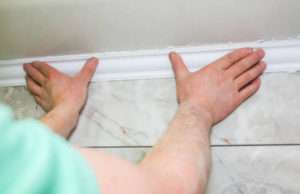
Let the adhesive set for a few minutes, then put the molding with glue up to the wall or where you’re installing it to. Firmly press the molding into place and hold it tightly against the wall for about 1-3 minutes. If you want to adjust the position of the molding, construction adhesive gives you a working time of about 10 minutes before it dries.
Final Thoughts
While installing crown molding with construction adhesive, make sure you wear latex gloves to protect your hands and keep the molding free of fingerprints. Also, use lightly-applied adhesives to prevent overflow when you secure the pieces.
Other than that, construction adhesive reduces or eliminates the need for nails and other fasteners when installing crown molding. Better yet, adhesive offers tight smooth seams and speeds installation. However, the type of adhesive used may vary depending on the crown molding material, wall type, and project settings.