
This post may contain affiliate links which means I may receive a commission for purchases made through links.
Most homeowners only realize their thermostats have batteries when they see the warning displays on the display. Home thermostat battery replacement protects the device from losing the thermostat settings. Moreover, dead thermostat batteries can hinder your device’s ability to control the HVAC system.
Specifically, programmable digital thermostats can be set to increase or reduce the indoor temperature during specific times of the day to keep your electricity bills in check. Unfortunately, these settings can be lost in a power outage. To prevent that, most programmable thermostats are either equipped with 3V button-style lithium batteries or AA/ AAA alkaline batteries. This helps the thermostat to retain its settings in case of a power outage.
Luckily, you can easily fix this issue by replacing your thermostat batteries, at least once a year. But, how do you do that? Well, read as I show you how to do home thermostat battery replacement step by step!
When should I do home thermostat battery replacement?
Most experts recommend changing your thermostat batteries once a year, usually at the start of a high-usage season like winter. Some batteries might not make it 3 months, while others can last for up to 5 years. However, to be on the safe side, here are some of the signs you need to look out for;
-
Home thermostat low battery symptoms
As already mentioned, the primary function of thermostat batteries is to save any programmed settings in case of short power outages. Also, this helps your heating & cooling system run uninterrupted. To alert users when the batter is about to die, most thermostats have a low battery indicator on their screens. The indicator can either be a battery symbol, a flashing light, or a text showing the warning. Whichever the case, the indicator usually appears about 1 – 2 months before the home thermostat battery dies out completely. Therefore, you’ll have enough time to buy new batteries and replace the old ones before your thermostat’s display totally goes blank.
-
The display goes blank
If you ignore the low battery indicator, the batteries will eventually die, making the display go completely blank. As a result, your thermostat will stop working. More notably, your HVAC system will stop responding to non-existent temperature commands, thus preventing it from functioning. So, before you claim that your home thermostat is going bad because of a blank display, replace the batteries!
-
During the annual HVAC system checkup
Proper thermostat maintenance is important to increase the longevity of your heating and cooling system. This includes replacing the thermostat batteries during the annual HVAC system checkups. Moreover, this is a great way to ensure that you replace your thermostat batteries once a year, as recommended by HVAC experts.
The best type of batteries for Home Thermostats
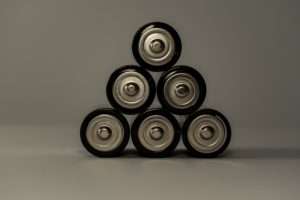
Although some thermostat draws their power from your home’s HVAC or electrical system, most models still use batteries. Typically, battery-powered programmable thermostats use regular AA/ AAA alkaline batteries, 9V batteries, or button-style 3V Lithium batteries.
To determine the right type of battery for your home thermostat, it’s recommended that you look at the owner’s manual. Alternatively, you can simply look at the batteries your device is already using and replace them with the same type. However, I recommend that you go for Lithium batteries if they’re compatible with your thermostat since they’re more powerful. More importantly, Lithium batteries corrode less compared to standard alkaline batteries. On the same note, avoid installing damaged or leaking batteries in your thermostat since they may corrode and damage its electrical components.
How to replace batteries in your home thermostat
Before you start home thermostat battery replacement, gather all the essential items you’ll need for the task. This includes a flat-blade screwdriver, Alkaline/ Lithium batteries, and a flashlight. Once you’ve gathered these items, follow these steps;
- Turn off the thermostat. Then remove the thermostat housing from its wall mount plate by pressing the tabs on both sides of the device. Alternatively, remove the small screws holding the thermostat housing. Note, that the process of removing the thermostat housing tends to vary from one model to another. So, make sure you read the user manual of your specific model before you proceed to remove its cover from the housing.
- After removing the thermostat housing, turn it over to locate the battery removal slots. Insert the flat-blade screwdriver into these slots and use it to lift up the old batteries. Also, this is a great chance to look at the type of batteries you need for your device.
- Slide the fresh batteries into the appropriate slots, with the positive and negative terminals facing the indicated directions.
- Once you have put the fresh batteries in place, reattach the thermostat housing onto the wall plate. Make sure the little posts on the back of the housing are aligned with the terminal screw block. Now, slide down the cover on the mounting plate until it snaps back into place.
Final Word
A dead or weak battery is one of the main factors that may make your thermostat appear as if it’s dead. Also, this might cause problems with your heating and cooling systems. Hopefully, home thermostat battery replacement will help you avoid those issues. However, avoid installing old-looking, rusty batteries or rechargeable batteries unless they’re specifically designed for your thermostat model. If your HVAC system or thermostat doesn’t function properly after installing fresh batteries, check for other home thermostat problems symptoms. Alternatively, contact a local HVAC technician to troubleshoot the thermostat for you.